So we click on the sample page, tada! It’s working. Homepage, tada! It’s working. Now, we want to go into your c-panel control panel. We need to get a zip file of all the contents of our WordPress directory and we need to get a backup of our database. We’d do that through the phpMyAdmin. But first, I want to pull in my timer here so that we can do this in under 5 minutes. Go ahead and click on that and go. Let’s get the database first, so we click on phpMyAdmin, and we want to make sure we are backing up the database that pertains to the WordPress site we’re going to be backing up, and I know it’s this guy here so we select on that, and it shows all the tables. Go to export. Go. Oh, this is fine. Just the default settings. Navigate to where we wanted to be downloaded to, and I would go ahead and put it in a folder that is dated. In that way, you’ll know that this and the other backup we’re about to do is related to one another. Frankly, I’d only keep like 3 of them. The most recent 2 and then the new one. Delete the 4th one, the 4th oldest one. If that makes sense.
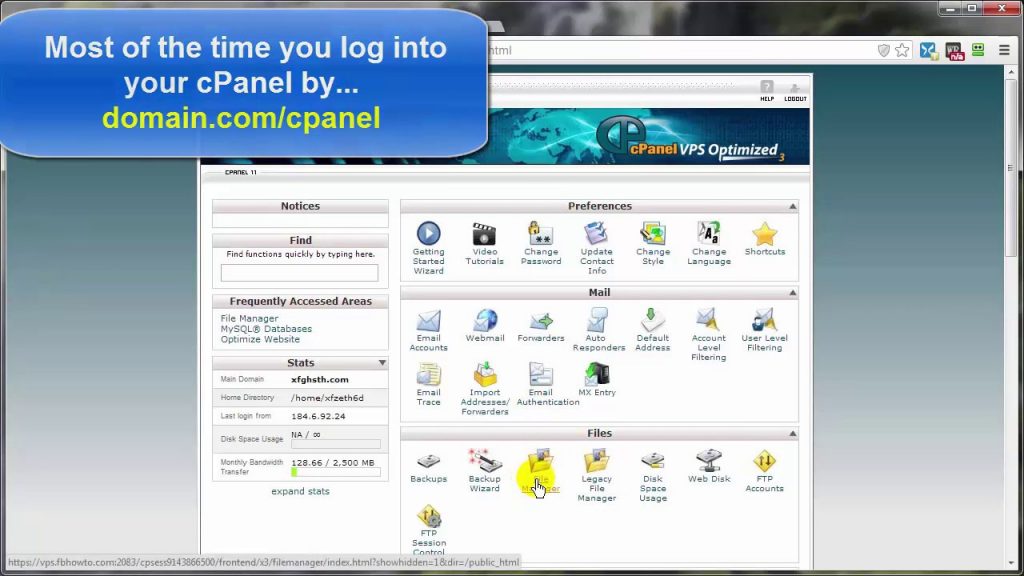
Okay so now we got that backup, I’m going to leave this open. Come on back to our c-panel, come on up to the file manager, and these here are just other folders or other directories have nothing to do with this WordPress install. This one does and I’m going to go all the way down to the bottom here. Holding the shift key of my keyboard down and then select the bottom file and that’s like everything. Or you should just click on this guy here to select everything. And then, come on up here click on compress. Before I click on compress files, I’m going to give it a different name. This time, I’m going to name this one today’s date, then compress. And again, this is time-based on how big your site is, and there it is right there.
We want to download this to our directory ideally in the same location where that database is so that we know where everything is. Since this is also going to be required to be uploaded to make this full demonstration, no need to waste the time, the downloading and the uploading because it’s going to come back here in a second because I’m about to break the site here just to demonstrate how to fix it.
So let’s just pretend that I’ve downloaded it and that I’ve also uploaded it. But let’s go ahead and come on back to the site. Now, we’ve got our backup done. We’ve got all these all zipped up and downloaded, and we’ve got the database all zipped up and downloaded. Come on back to the site here. I want to go to the dashboard area, oh wait, no. Let’s come to the c-panel, that’s what I want to do. Go back to the file manager where I was, duh! Go to the config file. Let’s go and open this up, code editor. I guess I can do this with just about anything but I was going to grab that and delete it. That should do some damage, and then save changes. And then, get that out of there, come on back here, refresh, and yep, it’s definitely broken.
Now then, to repair, let’s go in back in here because we don’t know what broke, right? So we want to first upload our clean database, so we come in here, we want to select all of these tables. We want to get rid of them. Come on in here and drop them, are you sure you want to do that? Yes! Now, we want to upload and install our clean database. Import. Select the one we just downloaded earlier, that’s this guy right here. Come on down here and click on go. Give it a second, again, it’s time-based on how big your database is. And there we are. Okay, database fixed. Come on back in here, go to file manager which is this one right here, and now then, let’s again pretend that we’ve uploaded this guy here and we want to make sure it’s selected. Come up here and extract, and it will overwrite all these other guys here. Extract. Bang, bang, boom. Done. Now then we can delete this, because everything’s fixed, right? Hopefully, fingers crossed. And come on back to our site here, refresh, and we’re back to normal.
And that is how you can backup both files and database, how you can break your site. Hopefully, you don’t need to do that, and how you can actually restore everything from those original backups. That’s going to bring us to the end of this video on backing up and restoring and breaking your WordPress site.
Thanks for watching and you have a great day.