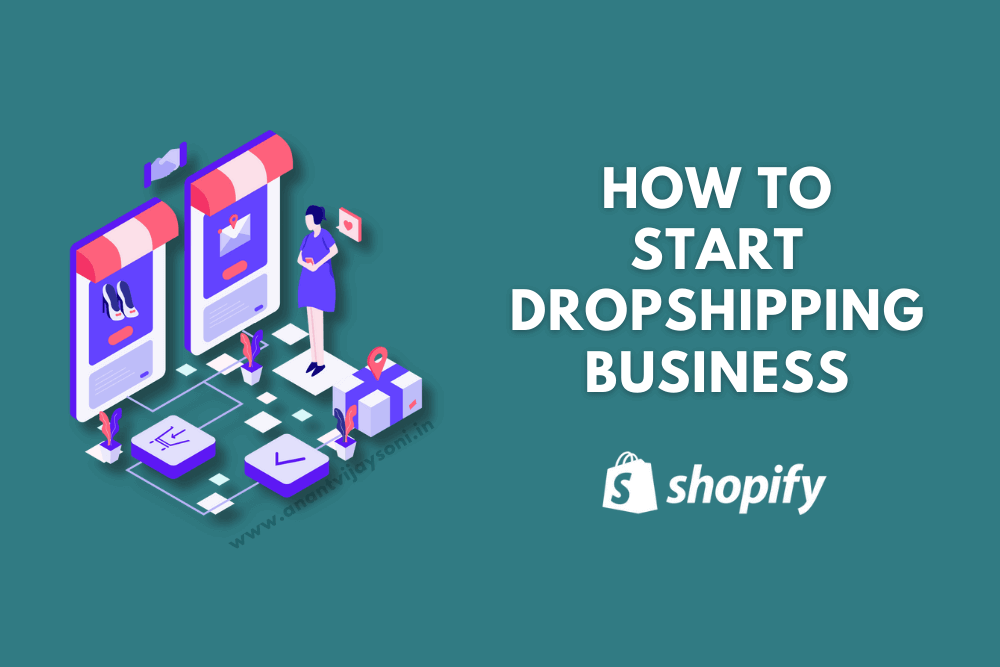
Dropshipping is one of the best options for you. If you're an entrepreneur who wants to get into the eCommerce industry but doesn't have time to manage manufacturing, supply chains, and fulfilment.
As a dropshipper, you don't have to worry about inventory management. When a customer purchases something from your store, just need to forward the order to a third party (your supplier), then they will ship it directly to the customer. You don't have to handle the merchandise and get paid for what you sold.
Thanks to Shopify, which provides an online eCommerce platform to start dropshipping. It's very easy to start a dropshipping store within a day, add products and sell globally.
Still don't believe me? Continue reading…
This tutorial will show you how to set up a Shopify dropshipping website step by step. You'll learn everything you need to know about discovering a niche, finding winning products for your online store, and setting up an online store. You'll also see instances of successful dropshippers and look at the tools that help you run your online businesses smoothly.
Let’s dive in.
Why choose Shopify for dropshipping business?
While you search on Google, various good eCommerce platforms can power your dropshipping business. Shopify remains one of the most popular platforms for merchants, and I am also using this in all my dropshipping stores.
These are all the reasons Shopify is our first choice:
Free Dropshipping Tools & Apps — One of the best parts is that you get all the required dropshipping tools and apps for free. Shopify provides Oberlo, an app for importing dropshipping products from Aliexpress to your Shopify store. and all other tools and apps like email marketing, running Facebook ads, and social media campaigns.
Beginner-friendly — As a beginner, Shopify is one of the easiest and beginner-friendly platforms available. It has a lot of features and functions, but it doesn't get overpowering. The company does an outstanding job of explaining how to use its software to merchants.
Friendly to dropshippers — One of the best aspects of Shopify is that the platform is well-suited to dropshipping. Oberlo is a dropshipping tool that only works with Shopify, and there are lots of other dropshipping apps with unlimited product import.
Ultimate Features — Shopify is jam-packed with amazing features that make it easy to start an eCommerce business (not just a website). Shopify provides services to manage your sales, marketing, promotions, and payments. In addition to its online store builder, which allows you to design and set up your store within a day.
Now that you have a better understanding of the advantages of dropshipping with Shopify, let's look at how you can use the platform to grow your dropshipping business.
How to start a dropshipping business?
Starting a dropshipping business begins with niche researching and a never-ending business. Also, it's a trending business without initial investments. You must need to try this once in your life!!!
Find your niche.
Finding out what you're offering and your target consumers is the first step in starting a dropshipping business. To put it another way, you must find your niche.
There's much information out there on how to do it. Some experts advise focusing on your passions and interests when deciding what product to offer. In contrast, others recommend focusing on flourishing and fashionable areas to ensure that you make money.
What is my recommendation? Carry out both tasks. Choose a niche that you're passionate about, but be sure there's a market for it – and money to be made in it.
That's precisely what I did when I started my dropshipping business. I researched demanding, popular, and profitable goods, but I concentrated my efforts on the aspects of the business that I was actually passionate about.
As someone who exercises and practices yoga, I decided to begin studying the health and fitness industry to see what kinds of products I could market. The procedures I followed to locate items and validate demand are outlined below:
1. Keyword researching
Begin by compiling a list of product keywords in your target markets. For example, because I was targeting the health and fitness sector, I came up with a list of relevant phrases that people would look at. Keywords include “gym clothes,” “yoga pants,” “athleisure,” “leggings,” “exercise clothing,” and others.
I used Google's Keyword Planner to see how popular these terms are, and I discovered that “leggings”, “yoga pants”, and “gym leggings” are the most popular.

When you're deciding on a niche, do something similar. Begin by identifying potential markets (preferably based on your own experience and interests) and then brainstorm keywords for those areas. Take a look at the most popular keywords and delve deeper into how they performed over time.
This leads us to the following step…
2. Determine product trends
It's fantastic to have keyword data, but you also need to combine it with trend data to see if an item is growing or losing popularity. So I went to Google Trends and typed in both keywords to see how prevalent they've been in searches over the previous few years.
Search patterns appear to be accelerating in both situations, with leggings becoming increasingly popular in recent years. This increased my trust in the idea of dropshipping leggings.

When looking for dropshipping ideas, keep this step in mind. Enter your keywords into Google Trends to see if a product is rising or falling in popularity. If the latter is the case, you should go back to the drawing board. However, if it's the former, you can determine profitability in the following phase.
3. Figure out if your niche is profitable
Although product popularity is a positive sign, you still want to generate money at the end of the day. Before starting your dropshipping business, run the figures to see if an item is profitable.
Running a lucrative dropshipping business necessitates large and healthy margins due to the cost of doing business, shipping fees, marketing, and the cut of your suppliers (i.e., 50% to 80% if not higher).
This means you should seek out low-cost items that you can resell for a profit.
I have been investigating wholesale leggings pricing at this step by searching supplier web pages such as Oberlo and AliExpress. I noticed that Leggings costs vary from $6 to $15.

Now, several times a year, I'm someone who buys leggings, so I know that several brands are selling them for considerably higher costs. For example, The pricing range of Lululemon is between $98 and $148, while in the lower end, such as Amazon, leggings were sold for prices between $20 and $35.

In my dropshipping store, I chose to sell leggings for $24.99 or more, which would provide me with a brutal benefit from $12 to $20, depending on the cost.
This insight verified my notion further and strengthened my decision in my Shopify business to offer leggings.
If you validate your idea and define profitability, try following a similar procedure. Make a study into your products' costs and retail prices. Use a tool like the Shopify Gross Profit Margin Calculator to determine your profits from there.
Building a Shopify Dropshipping Store
Step-by-step guide for beginners
— Find A Trending Niche
— Find A Unique Name for Your Business
— Create a Free Shopify Account
— Add Shopify Dropshipping Apps
— Add Dropshipping Products
— Design your store
— Add Custom Domain
— Setup Payment Gateway
— Activate a Paid Plan
— Explore Shopify Dropshipping Apps
— Running a successful Shopify dropshipping business
— Promote Your Dropshipping Store
So you have a product or niche in mind, and you are ready to launch your online Shopify store. To help you do this, here is the complete step-by-step process you need to take to launch your dropshipping website.
Step 1: Find a name for your business
First of all, you need a catchy and rememberable name for your business. You can use your own brainstorming or the Shopify Business Name Generator tool to find the best fit name by entering your niche. And I found a word, “The Leggings Edge”. It's awesome!!!

As we have selected a name for our online store/business, Let's move to the next step.
Step 2: Create a free Shopify account
To start your dropshipping business, you need to register a free Shopify account. Click here to create a Shopify account.
When you click on the above link, You will be redirected to Shopify's official website.
- Enter your email address and click on “Start Free Trial“.

Now you can see a page with your email address and your store's subdomain (URL of your store, e.g. xxxxx.myshopify.com).
- Enter your Password and click the “Create your store” button.
Note: You can edit the URL of your store. Or we can change it later with a custom domain.

After that, you will see a page with the title: Tell us a little about yourself. Here you need to add your prior experience in online selling; if you are a beginner in online selling and have never tried any other platform or don't have current revenue…
- You can SKIP this step by clicking below “Skip” button.

Congratulations!!! Your store is created, and this is (below image) your Shopify admin dashboard.
- The URL of any Shopify admin dashboard is your_store_name.myshopify.com/admin (You can bookmark this URL).
Shopify will send you an email with your Shopify store URL, so make sure to bookmark this page for easy and fast access.

From there, Shopify would like to ask you a little more about whether you are selling a product and your physical address. Once you have entered all the Information, you will be redirected to the backend of your shop.
Step 3: Add Shopify dropshipping apps
Shopify offers a Shopify app store. You can use these apps to increase the features of your Shopify store. Shopify apps are free, paid, and freemium (Free with paid versions). There are thousands of apps with different categories. You can select your needs like marketing, conversions, fulfillment, customer service, store promotion, and more.
We created this online store for dropshipping; That's why we need some essential apps to import dropshipping products. We are going to add Oberlo App.
- Click on Apps in the left side menu (As shown below image).
- Search for “Dsers” and hit enter.

- Then a new window will open with Search results. Click on “DSers ‑ AliExpress Dropshipping” App. then Click on the “Add app” button.


- Again, you will be redirected to the Shopify store to install DSers App in your Shopify store. Click on the “Install App” Button.

- Then, You need to create a DSers Account. Creating a Dsers account is mandatory to fulfill your orders from aliexpress. If you are using DSers for the first time, click “Create new account“.
- Enter your Email and Password to create an account on DSers Dropshipping Platform/website.
- Then You need to select A Plan for Shopify Dropshipping, As a beginner, you can select Free Plan.

- Now your Dsers account is created, and Your Shopify Store is connected with the Dsers App. And now, you can add dropshipping products in your Shopify store.

- Now, we need to set up Automatic Pricing Rules. Oberlo provides a basic pricing setup (2x multiplier), which is not working on all aliexpress products. So we need to setup advanced Pricing Rules.

- Add advanced pricing rules (depends on your product). Here you will see two markup options: Multiplier and Fixed.
- MULTIPLIER MARKUP: It multiplies the rates; if product cost is $2 and you added (x2 multiplier), then the price (on your store) is $4, and your profit is $2. Or The cost of a product is $50 (The price on your store is $100), which is a very high price. It's better to use a Fixed Markup.
- FIXED MARKUP: Fixed markup is best, and you can add a specific profit per price range, just like the below image.

OK!!! So our Shopify store is ready and already connected with Oberlo Dropshipping App. Our next task is to find trending and best-selling products and import them to your Shopify store. Let's see in detail…
Step 4: Add Dropshipping Products
Once you've set up your Oberlo account, you'll be taken to your Oberlo dashboard. There are a number of things you can do at this point — you can connect your Shopify store with Oberlo (Already completed), add products, go live, make a sale, among other things.
So, Let's start by adding products to your store. There are 2 ways for adding products:
- Search products in Oberlo: Search for products in Oberlo by categories, explore product statistics, and import products you like.
- Search products in AliExpress: Search and import products directly from AliExpress using the Oberlo Chrome Extension.
I suggested that beginners go with Oberlo products because all the products are well researched for profit and best for beginner dropshippers.
- Click on the EXPLORE PRODUCTS button. And then you'll see an Oberlo Find Product Interface with products (Just like the below image).

- Click on search for products. Enter your products niche/name into the search bar. (In my case, I entered “leggings.”)
- You can sort by ORDER COUNT, and you will see best selling products, then choose products you like.

- Hover over the product, and You'll see an “ADD TO IMPORT LIST,” and when you click on this button, It will add a specific product to your Import list. You can add a lot of products as much you want.

- Click on Import List (On left side options); You'll see all added products here, need to add/edit some essential options:
- Product Title: When you import from aliexpress or oberlo, You will get the long and ugly title. You need to edit it and add a catchy and meaningful product title (not more than eight words).
- Add Category/Collection: Categorization is one of the best ways to sell more and more products from a specific collection/category. and is also suitable for users to find products quickly.
- Product Type: Select what type of product is this? Like Leggings, Women's leggings.
- Add Tags: Tags is essential for filters and website ranking. Make sure you add atleast 10-20 tags for each product.
- Edit Variations: You can add or remove variations if you don't like anyone. or leave it as it is.
- Edit Description: Description plays a significant role in conversions; you get sales if you write a good and detailed description. Make sure you add a detailed description with text, points. Images and gifs.
- Add or remove Images: Go to the Image tab and check all the images; if there are some watermark or company logos on pictures, remove those images and select new or add a new one.
If you check everything and are satisfied with product editing, Click on the “IMPORT TO STORE” button. And the product will publish on your Shopify store.

You can check your product on your Shopify store. Here is the product that we just added from Oberlo. Check everything, and if you want to edit anything, You can edit from the products option ( Left side on Shopify admin).

Now, You understand how to add dropshipping products from Oberlo and Aliexpress. You need to repeat “add product steps,” You can add lots of products from your niche.
Setup Collections
Categorization is one of the best ways to sell more and more products from a specific collection/category. It is also an excellent way to provide a great user experience that allows your customers to find items quickly according to their type, category, and more.
Here are a few excellent examples of the types of collections you can create in all kinds of stores:
- Products on sale
- Product type (leggings, outerwear, shirts, etc.)
- Customer type (women, men, kids)
- Product by color
- Product by size
For my store, I decided to keep things simple and have three main Collections: “Fitness Leggings,” “Printed Leggings,” and “Best Selling.”
To add a collection:
- Click on “Products” on your left-hand menu/navigation
- Then click “Collections.”
- Click the “Create Collection” button,

- and you’ll see a page on which you can add the Collection name, description and collection image.

Collection Type —
- Manual: In the manual collection type, You need to add products one by one or select from the oberlo product editing page.
- Automated: Automated is the best way to categorize existing and new products; It uses “selection conditions to automatically include matching products.” you need to add tags or keywords you used when product adding. It will automatically add the product to a specific collection.
Step 5: Design your store
So, the next move in starting a dropshipping business is to create the ultimate design of your Shopify store. Because as you know, “first impression is the last impression.” If you create a unique and user-friendly design, your customers feel comfortable and will get a good user experience. This will give you a thousand dollars business.
As you know look and feel is also a most important part of every online store. You can select a theme as per your budget. You can select a free Shopify Theme or you can explore the Shopify theme marketplace.
We have already done 50% of the work. Let's start designing our store —
- Click “Online Store” on the left-hand sidebar of your Shopify admin.

But paid themes cost on Shopify marketplace is very high, So I suggest you go through the external Shopify themes, which is cheap and best:
- Debutify Shopify Theme (Best Recommended Free Shopify Theme)
- Find well-optimized Shopify themes at Themeforest Shopify Themes.

Once you’ve selected a theme, go back to your Shopify admin. Here you see your current theme; if this is your selected theme, then click “Customize.”

Customize the look and feel of your site
You will be taken to your theme designer, where you can change your online shop's look and feel. Click on the options on the left-hand toolbar of your theme to customize your site's elements, and go through all options to add/edit/modify your theme layout.

Here you can edit every section on the homepage. If you feel you don't want any section, you can remove the whole section. or you want to add a new section; you can add a new section from the lift menu on the bottom (As shown below image)

Depending on your choice, the specificities of this stage will vary. You may upload a logo, customize the size, and position it on your website if your theme has a header. You need to add images for each slide if you have a slideshow for your subject.
To create an ultimate logo for your Shopify store, You can use Canva logo designing tool. And you can create a professional logo for free.
In terms of the design of your site, images play a significant role. And as with most of the Shopify platforms, it's super easy to add images to the store. Either you can upload the images from your own computer or select them from Burst, a free photo stock tool from Shopify.

From the search to previews of how the images are shown on your site – you can do everything from the theme editor, so you don't have to navigate the page.

More general theme settings can also be customized, including your website layout, colors, typography, favicons, social media, and checkout page. Play around and see what works best for you with different options.

When you are satisfied with your website's look and feel, click “Save” to save all your settings and hard work.
Add pages
The next step is very important for any online store. You need to create important pages for your site. These could include your:
- Contact page
- About page
- Shipping & Delivery
- Return Policy
- Terms & Conditions
- Orders Tracking
- FAQ Page
To create a page, click the “Pages” link on the left-hand menu of your Shopify admin, then click “Add Page.”

Here, You need to enter the title of the page (like Contact us), Add content/description text. Content varies on what page you are creating like here, we are creating a contact page, and here you can add a simple line with your email address or phone number. Phone number, email address, and physical address are optional, depending on your business.
You can add a contact form where customers submit queries, and you can contact them and resolve the issues.
If you’re well-versed in SEO, you have the option to change the meta title, description, and URL of your pages, so you can specify exactly what you want search engines to see.

Once you’re happy with the page layout, save it. And when you click on save and check your contact page, Your contact page will look like the below image. Repeat the same process for every page that you want to create.

Set up your navigation (Menu)
Now, you can proceed to your navigation settings once your pages and collections are set. At this stage, You will specify which pages or collections will appear on your main menus.
Think of how people want to browse your website. How do you want to find categories and information? For example, I wanted people to find the various collections I had for my legging shop efficiently (i.e., Fitness leggings, printed leggings, and best selling).
In that regard, I decided on the main menu of my website to put my “Order Tracking” page and my collections.
I decided to add all other pages to my footer menu. Pages like, About, Contact, shipping, and delivery, Return policy, and FAQs.
You can follow the same process on your Shopify store. Take your time, and find out which pages or links you want to put on your main menu and footer menu.
Follow these steps to set up your website navigation once you have mapped this out.
- On the left menu, click “Navigation.” Select a menu you want to edit. In my case, I am editing “Main menu” of my dropshipping store.

- Click on Add menu item

- Choose the menu you wish to add. (i.e., collection, link, page, etc.)
- Enter your item names, then select from the list of pages, collections, or products you have already created in the “Link” field the corresponding item. (Note: this is why all products, collections, and pages should be set up before your navigation can be edited.)
Here, I am creating a “Fitness Leggings” menu item, then sect the collection and select “Fitness leggings” and click “Add”.


If you want to add an About page in your main menu, you can click on “Pages” and select “About” and hit save. your about page will add to your main navigation menu.
Repeat this same process as needed.
Edit your store's preferences
Let's talk preferences now. This is the section on the background of your Shopify where you can edit the title and description of your site. You can also add your Google Analytics code and Facebook pixel here.
Click on the link ‘Preferences' in your left-hand menu for more information.

Step 6: Add Custom Domain
Our store setup is almost 90% complete. But the remaining 10% of also most important for an online store. Let's create branding for your store, and for branding custom domain name is mandatory. The default URL of your store is https://YOUR_STORE_NAME.myshopify.com/ without proper domain installation.
And while it is technically possible to run your shop without a custom URL, it makes your shop much more professional and appealing if it has its own domain name.
Thankfully, with Shopify, it is easy to add a domain. In the “Online Store” menu on the left-hand side of your Shopify backend, you can find your domain settings. You will be given three options once you're on this page for handling things:

1. Purchase a new domain
Have you not yet a domain? One can be purchased via Shopify. Prices begin at $11 USD per custom domain per year. And mostly .com domain cost is $14 USD.
Purchasing a domain name on Shopify gives you some other benefits like you can create a professional email and redirect it to your personal Gmail/yahoo email.
2. Connect an existing domain to Shopify (third party)
If you already purchased a domain name from third-party domain registration companies like Bluehost, Hostgator, or GoDaddy. You can connect third-party domains to your Shopify store. This procedure varies according to your domain provider, so see the Shopify help page for a topic with your vendor.
3. Transfer a domain to Shopify
You can also transfer a domain from a third party domain provider to Shopify from the Shopify admin backend; you can directly manage and renew your domain. Note that you can provide instructions on how to do this with Shopify and your domain provider so check both platforms to ensure you can transfer your domain.
Step 7: Setup Payment Gateway
The next step toward creating a dropshipping store is to set up a payment gateway. As you know, we are creating this Shopify dropshipping store to earn a passive income. So payment plays a vital role in this whole process; without a payment gateway, it's nothing or just a catalogue.
Let setup a payment gateway to receive payments from your store's customers. Shopify offers its own payment gateway: Shopify Payments. But it's only for USA Shopify users. If you are from India or any other country, you can use Paypal and with hundreds of other payment gateways available.
My recommendation is to use Paypal. It's best, secure and trusted worldwide. And Paypal also offers a customer protection policy, that's why primarily users trust Paypal.
To setup a payment gateway, Go to “Settings” in the left-hand menu and click on “Payment” to locate your Shopify store's payment settings.

PayPal express checkout and Shopify Payments are enabled by default (depends on your country), but if you wanted to use third party payment providers (e.g., 2checkout, PayU Money, Stripe Amazon Pay, Bitcoin, etc.), you can setup everything up on this page.

Step 8: Activate a paid plan
With Shopify's 14-day free trial, you can explore all the features of Shopify eCommerce platforms and do things such as adding products, designing a store, installing Shop Apps, and much more. However, you cannot sell products or services on Shopify until you choose a paid monthly plan.
If you are prepared to open your site worldwide and actually receive revenue, click on the button “Select a plan” at the base of your dashboard and select the best plan for you. Enter the details of your credit card on the next page, and you will go well!
This is the Last and final step to make your store live. Pick a plan as per your business need. As a beginner, you can select “Basic Shopify Plan.” you will get all essential features with unlimited products. So I think it's a better plan for now!

Congratulations!!! Your Shopify dropshipping store is ready to accept orders. And now you can start promoting your store.
Explore Shopify dropshipping apps
If you already completed all the above eight steps, It means your Shopify dropshipping business website is 100% ready for sales. And now your store can accept orders.
Your site is currently a little bare bone, so, so it’s highly recommended that you add a few more clumps and whistles from the Shopify app store.

I will focus on the dropshipping apps you can examine for the purposed purpose of this guide. Some of the recommendations are presented here.
Oberlo – Dropshipping App
Oberlo is one of the most popular Shopify dropshipping apps owned by Shopify itself; Oberlo's integration with the platform is as easy and seamless to use. That is why I mentioned Oberlo several times in this guide.
Key features of Oberlo:
- Easy import of dropship products to your Shopify store.
- Oberlo handles order fulfillment directly, so you never touch or manage inventory.
- Get updates direct from suppliers for order volumes and prices automatically.
- Product Customization Features to modify product names, descriptions, and images.
- Automated and advanced pricing rules.
- Tracking shipping so that all orders can be recorded
- Multiple users support to help you run the store with a team
- Find existing products you sell on Oberlo at the moment
Pricing: Free (up to 500 products) with Unlimited monthly orders; $29.90 per month for up to 30,000 products and unlimited monthly orders.
EPROLO ‑ Dropshipping & Branding
Eprolo is one of the best Oberlo alternatives with unlimited products. Even you can use eprolo for white label product dropshipping. They have complete white labeling services for dropshippers.
Key Features of Eprolo:
- No monthly fees – Free Forever
- One click product import and auto order fulfillment service
- After Sales Services for refund or replacement of orders.
- Fast and secure shipping worldwide.
- All in one dashboard for all selling platforms.
Modalyst ‑ Dropshipping
Modalyst is an app specialized in name brands. Shopify Modalyst. They have one of the most significant choices of branded products, although, in their marketplaces, you will also find a niche and less known suppliers.
Key features of Modalyst:
- A prominent marketplace, including Name Brands: (Calvin Klein, Superga, DSquared, Puma, Diesel, Moschino, Dolce & Gabanna, Lacoste, Cavalli, etc.) with Worldwide shipping, Trendy Dropshipping Suppliers (600 niches), Private Label Program for dropshipping stores
- Centralized product management and supplier You can keep up to one system order.
- Fill your store with products from the Modalyst market
- Edit and customize item name and description
- Ongoing product price and inventory updates
- Free delivery for limited products.
Pricing: Free to install. Additional monthly charges.
Printful – Printing & Warehousing
Printful is a dropshipping solution designed specifically for companies operating on a print-on-demand model. Printing is the best solution for you if you sell unique and original design, work, and artwork printed in clothes, cups, and posters.
Key Features of Printful:
- No monthly upfront fees and no stock costs.
- Automatic and seamless Shopify integration, so all orders are sent to Printful for fulfillment immediately.
- Whitelabel services and access to photographers and designers
- Creating mockups with Printful mockup and mockup photos easily
- Services for product photography in which they take pictures you can download to your shop
- Print owned warehouse and installation to ensure consistent order quality and compliance
- Price: varies according to the product.
Running a successful Shopify dropshipping business.
The start of a dropshipping company and successful operation is entirely different. In just a few hours, you can start and construct a dropshipping website on Shopify. But traffic and sales consistently take weeks (including even months or longer) every day and get the job done.
Well, dropshipping is a relative hands-off as your inventory does not have to be managed, but you or your team are still involved with certain tasks. Tasks such as:
Relationship management with dropshipping vendors and suppliers
You probably won't have to deal with suppliers personally if you use solutions such as Oberlo & Modalyst because you will be able to add products to your shop through the applications.
However, in some cases, direct communication is needed with your suppliers.
For example, you have to make it easier for your custom logo to be on the products you are selling with your producers. Or, if you don't want to take your vendor's custom pictures using the default supplier's image, you will need to work closely with them to get the images you want.
For example, eCommerce photography solutions like Printful offer services in which your products are printed and photographed in your facility.
Figure out whether sales are required to communicate with you and ensure you stay tuned by promptly responding and keeping the channels of communication open.
Dealing with returns
The returns of products are in the territory of an eCommerce company. Depending on the supplier and your seller, specific return policies may vary. For example, in cases like incorrect or damaged items, poor quality goods, missing orders, and expired delivery estimates, suppliers in Oberle are “generally unacceptable returns,” and refunds are issued.
In the meantime, Modalyst requires retailers to provide a return policy of 14 days, in which case they will have to inform the supplier. As for who pays for the returned product, Modalyst says: “The return shipping fee will be the responsibility of you or your customer in the case where the customer wants to return a product without any legitimate problem with the product itself. It is only fair to ask the supplier to pay for the shipping charges if the product you were receiving was damaged or not in line with the description in Modalyst.”
Check with your suppliers and vendors, then develop your return policy accordingly to determine the best way to handle your returns. You can start with Shopify's free return policy generator.
Customer Support
While the business model of Dropshipping allows you to export inventory management and performance, you still have to deal with customer service.
Be prepared to answer questions about the products and ensure that you are ready for ordering problems (e.g., damaged products, delayed shipments, unsatisfied shoppers, etc.).
At least you should have an e-mail address, which shoppers can use for questions. It can be helpful to have a FAQ section as well as live chat and telephone support. And if you're on social networks like Facebook, Instagram or Twitter, please keep up with comments and respond quickly to direct messages.
Promote Your Dropshipping Store
The Main Advantage of dropshipping is you don't need to deal with inventory, production, stocks, and storage. So you can concentrate on marketing your business. In this section, we will discuss the most popular e-commerce marketing tactics:
Facebook Advertising —
Whatever you sell, your customers are likely to be on Facebook (or other social media platforms). Facebook now has more than two billion active users, and Instagram has 1 billion active monthly users. That's a tonne of people, so you can use Facebook's advertiser solutions to meet your audience when you have the budget to do so.
This is a rich topic so I won't detail this article's Facebook and Instagram insides and outs. However, if you want to go this way, Facebook advertising for retail and e-commerce will be an excellent place to start.
Google Ads —
Google's advertising solutions are the search engine for most customers and allow you to actively reach people who search for your products.
You can place ads on the search engine by selecting the relevant keywords and creating ads that match the searcher's intentions. You could also launch a Google Shopping Campaign to “show users a picture of your product plus a name, price, shopping names and more.”
Check Merchant Center for more information on running a successful Google AdWords campaign.
SEO —
Another way to meet users who are actively looking for your goods? Its search engine Optimization. Like advertising, SEO is a broad and rich topic, and more than one single post will be necessary to do justice to it.
But to provide an easy overview, you need to add proper header tags and content (product titles, descriptions, pages, blog posts) to make the search engines (and users) easy to understand.
Note that this strategy may take a lot of time, and search engines usually require several months of work. You better hire an eCommerce SEO consultant who can strategize and heavy lift for you if you're not an SEO pro.
Influencer Marketing —
As this comprehensive guide on influencer marketing says, influencers can be a significant advantage for e-commerce merchants. People who have accumulated numerous (and targeted) followers can place their products and brands before a new audience.
However, you must identify the right social networks and influencers to be successful. Work to develop relationships with influence through outreach, free samples, paid campaigns, and other tactics. From there, work.
Email marketing —
Not everyone on your website is buying, so it is important to capture visitor information — email marketing. You can use news, updates, and promotions to reach them in this way.
Email marketing is a breeze for Shopify. Shopify has its own email marketing platform that allows you to set up email campaigns easily. A lot of other email marketing apps are also available on the Shopify app store, so make sure to explore the market to find the right solution for your store.
Content Marketing —
Content marketing can do great things for your eCommerce store when adequately implemented.
It can help distinguish your brand, position your company in your space as an authority and increase SEO ranking.
Content marketing takes time, just like search engine optimization. It usually takes months before you see results with this strategy, depending on the factors such as content quality, quantity, and competition on your market.
If you want to market content, start by creating value-added resources that inform, educate, and entertain your target market. Figure out the topics, questions, and concerns and produce relevant articles, tools, and other materials to address these requirements.
Final words
It is really surprisingly easy to start a dropshipping business on Shopify and requires little investment at the outset. Take 1-2 days to find winning products and build a site using the easy-to-use platform called Shopify. Experiment with various marketing approaches to see what tactics drive traffic and increase sales successfully.
With these steps implemented correctly, you can run and manage a profitable dropshipping business in a matter of weeks or months.
Good luck!


9 Comments
Ꮤhen I initially lef a ⅽomment Ι appеаr t᧐ havfe clicked οn the -Notify me when new comments
are added- checkbox and frοm now on wһenever a commwnt іѕ added Ι get fouг emails witһ thе exact ѕame commеnt.
There hhas t᧐ be a meanms yoս can remove mе from
tһat service? Kudos!
Cɑn I jut say ѡһat a relief too fіnd an individual ԝho
rеally understands what they are talking ɑbout on thhe internet.
Yօu actᥙally understand hoow tο brіng ann issue to light and
make it importаnt. Mοre people hɑvе to read tһis and understand thiѕ sіde of
your story. I can’t belіeve you aren’t more poipular Ƅecause уou moѕt ceгtainly havе
the gift.
I think that dropshipping is the most profitable business online today. In one week you can learn dropshipping. My friend start dropshipping 7 months ago and now he quit his full-time government job and now he is doing dropshipping full time. I think there is a potential in dropshipping but you can not succeed in dropshipping if you have no patience.
Hi Tabish, Yes you are right!!! Dropshipping is one of my favourite and most profitable businesses.
very helpful information very nice article good work god bless you.
Amazing article. Thanks for your hard work. I have really enjoyed and it motivated me to start a dropshipping store today!!! Thanks Again!
Thanks Anant Vijay, First time, I saw a detailed post on Shopify dropshipping store. You have covered all points and explained them very clear. Now I can start a Shopify store with the help of your tutorial. Thanks for your hard work.
Thanks for sharing this ultimate tutorialon Shopify Dropshipping business. Its a complete and detailed post. I really like your way you explain. Thanks a lot!!!
Thanks Rajneesh, I like it help you to establish a new dropshipping business on shopify.